Set Custom Domains Through Seed
Our serverless API uses API Gateway and it gives us some auto-generated endpoints. We would like to configure them to use a scheme like api.my-domain.com or something similar. This can take a few different steps through the AWS Console, but it is pretty straightforward to configure through Seed.
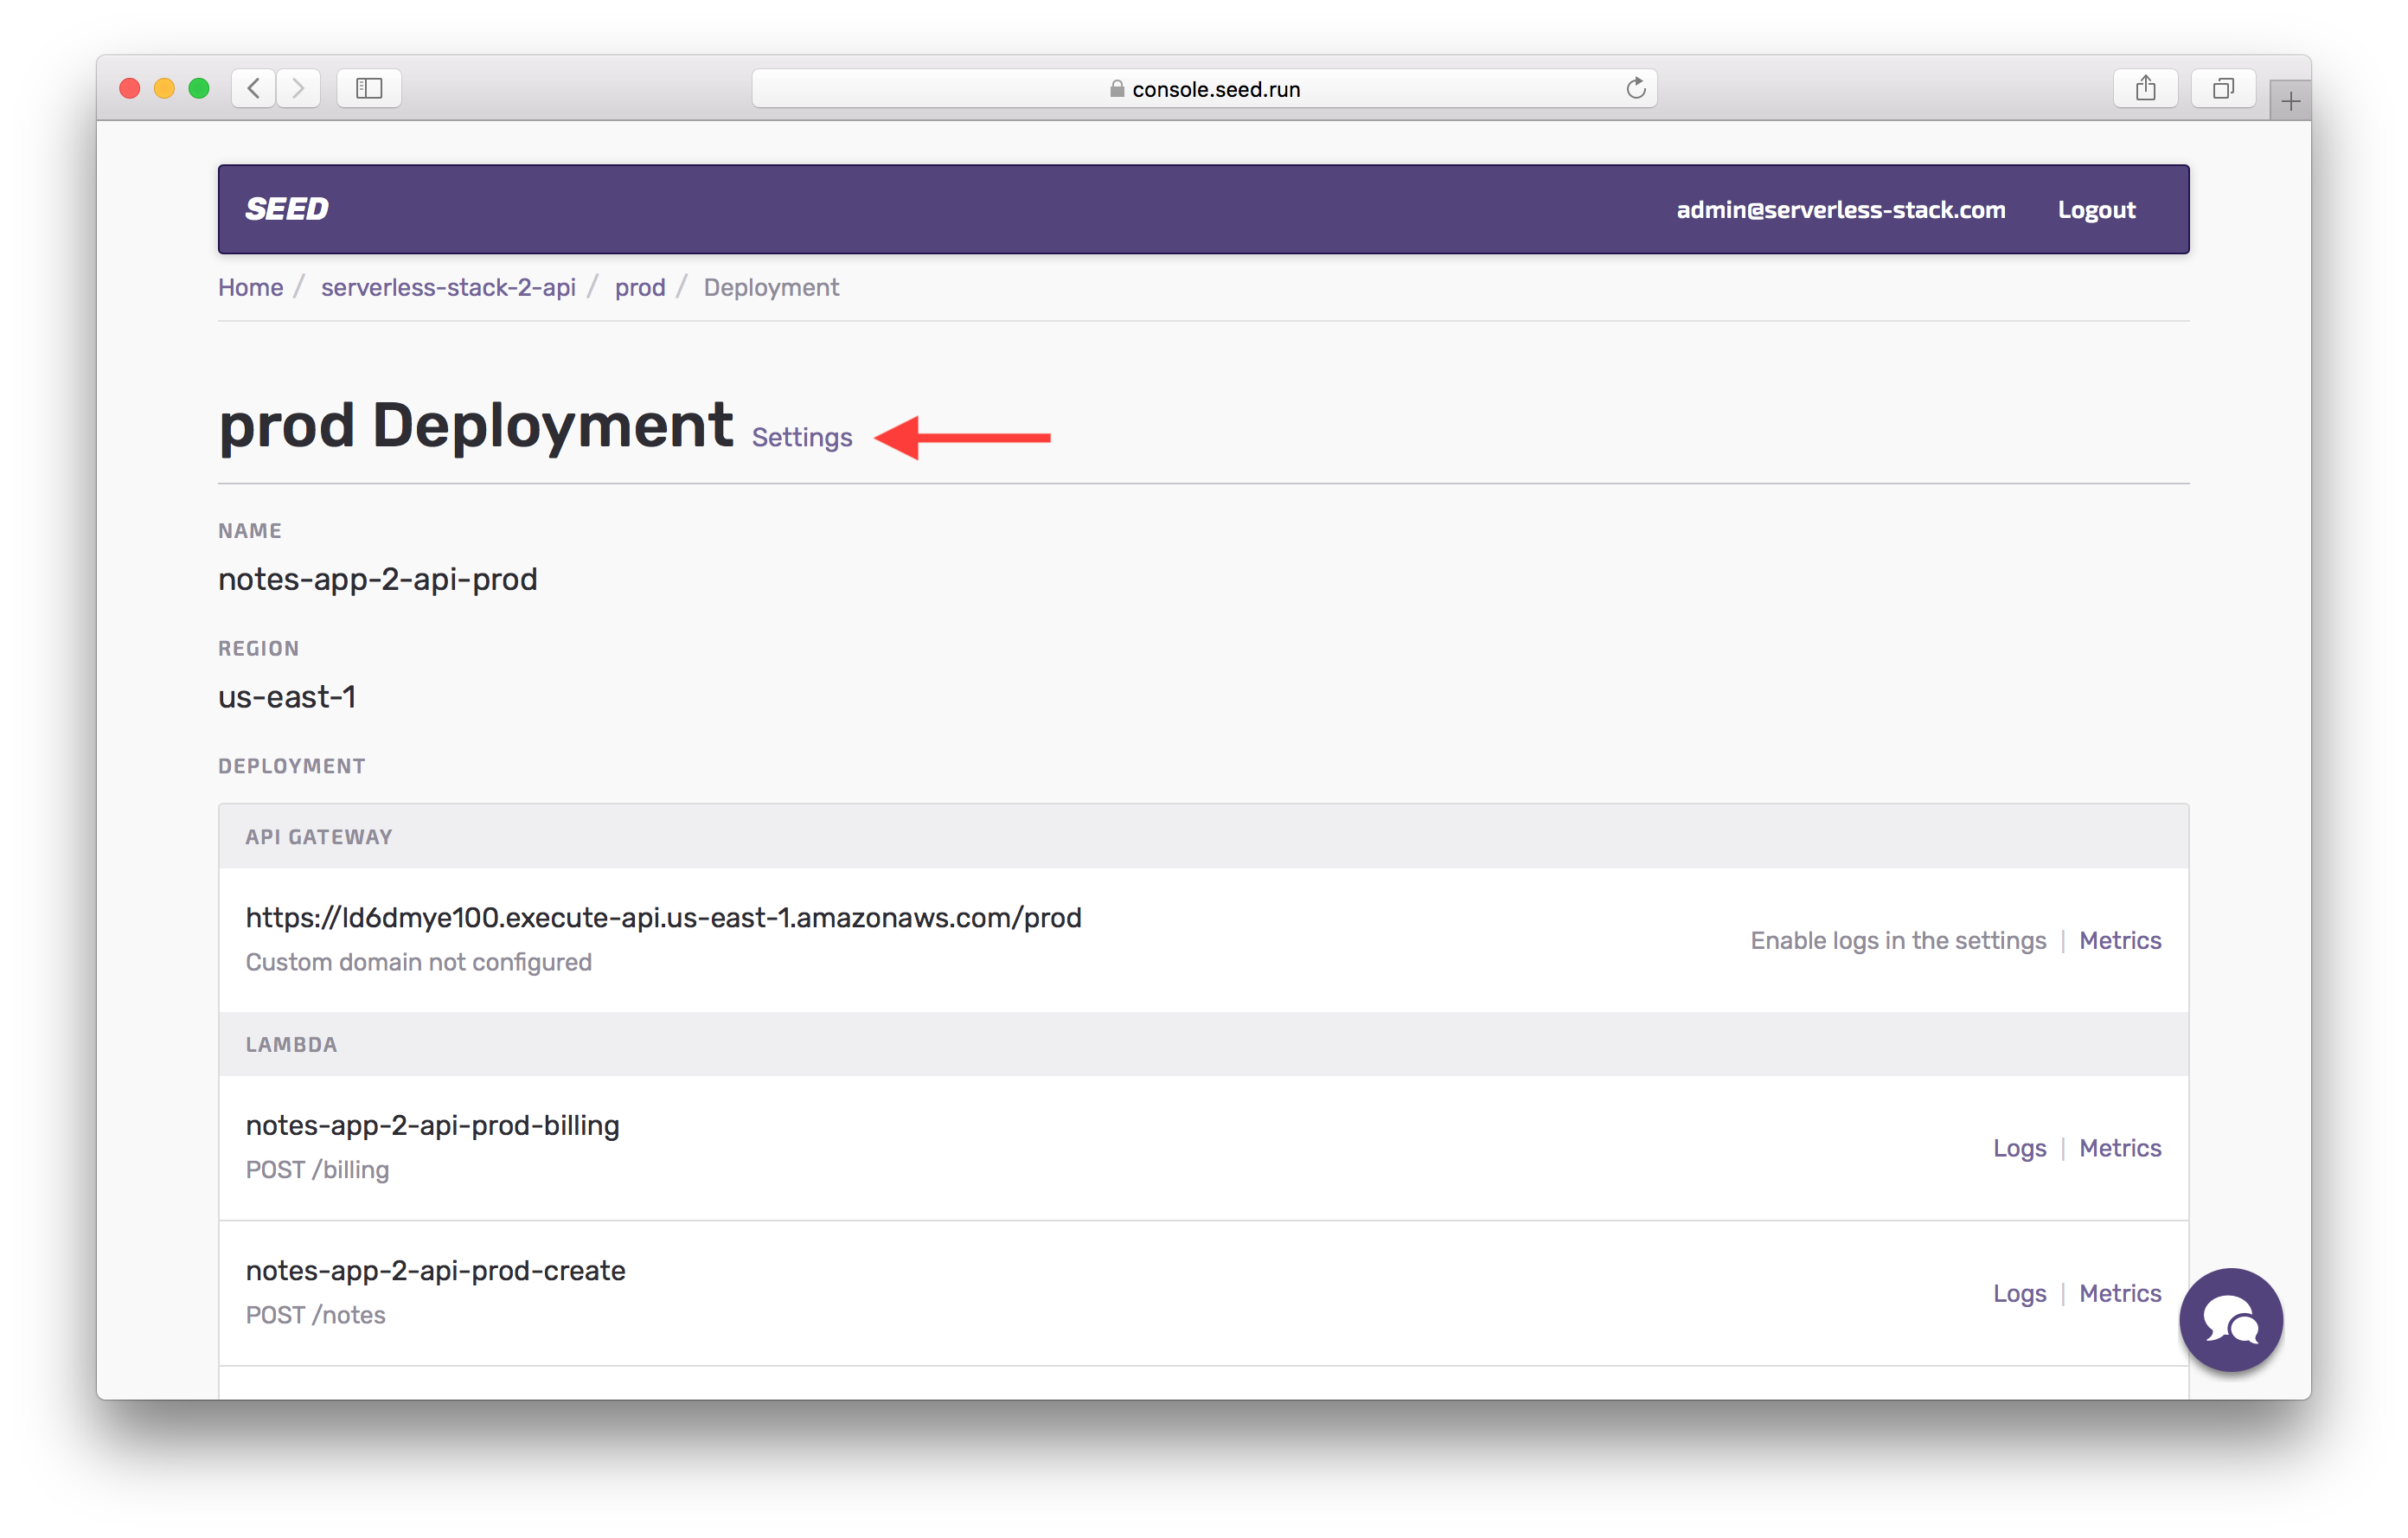
From our prod stage, click on View Deployment.

This shows you a list of the API endpoints and Lambda functions that are a part of this deployment. Now click on Settings.
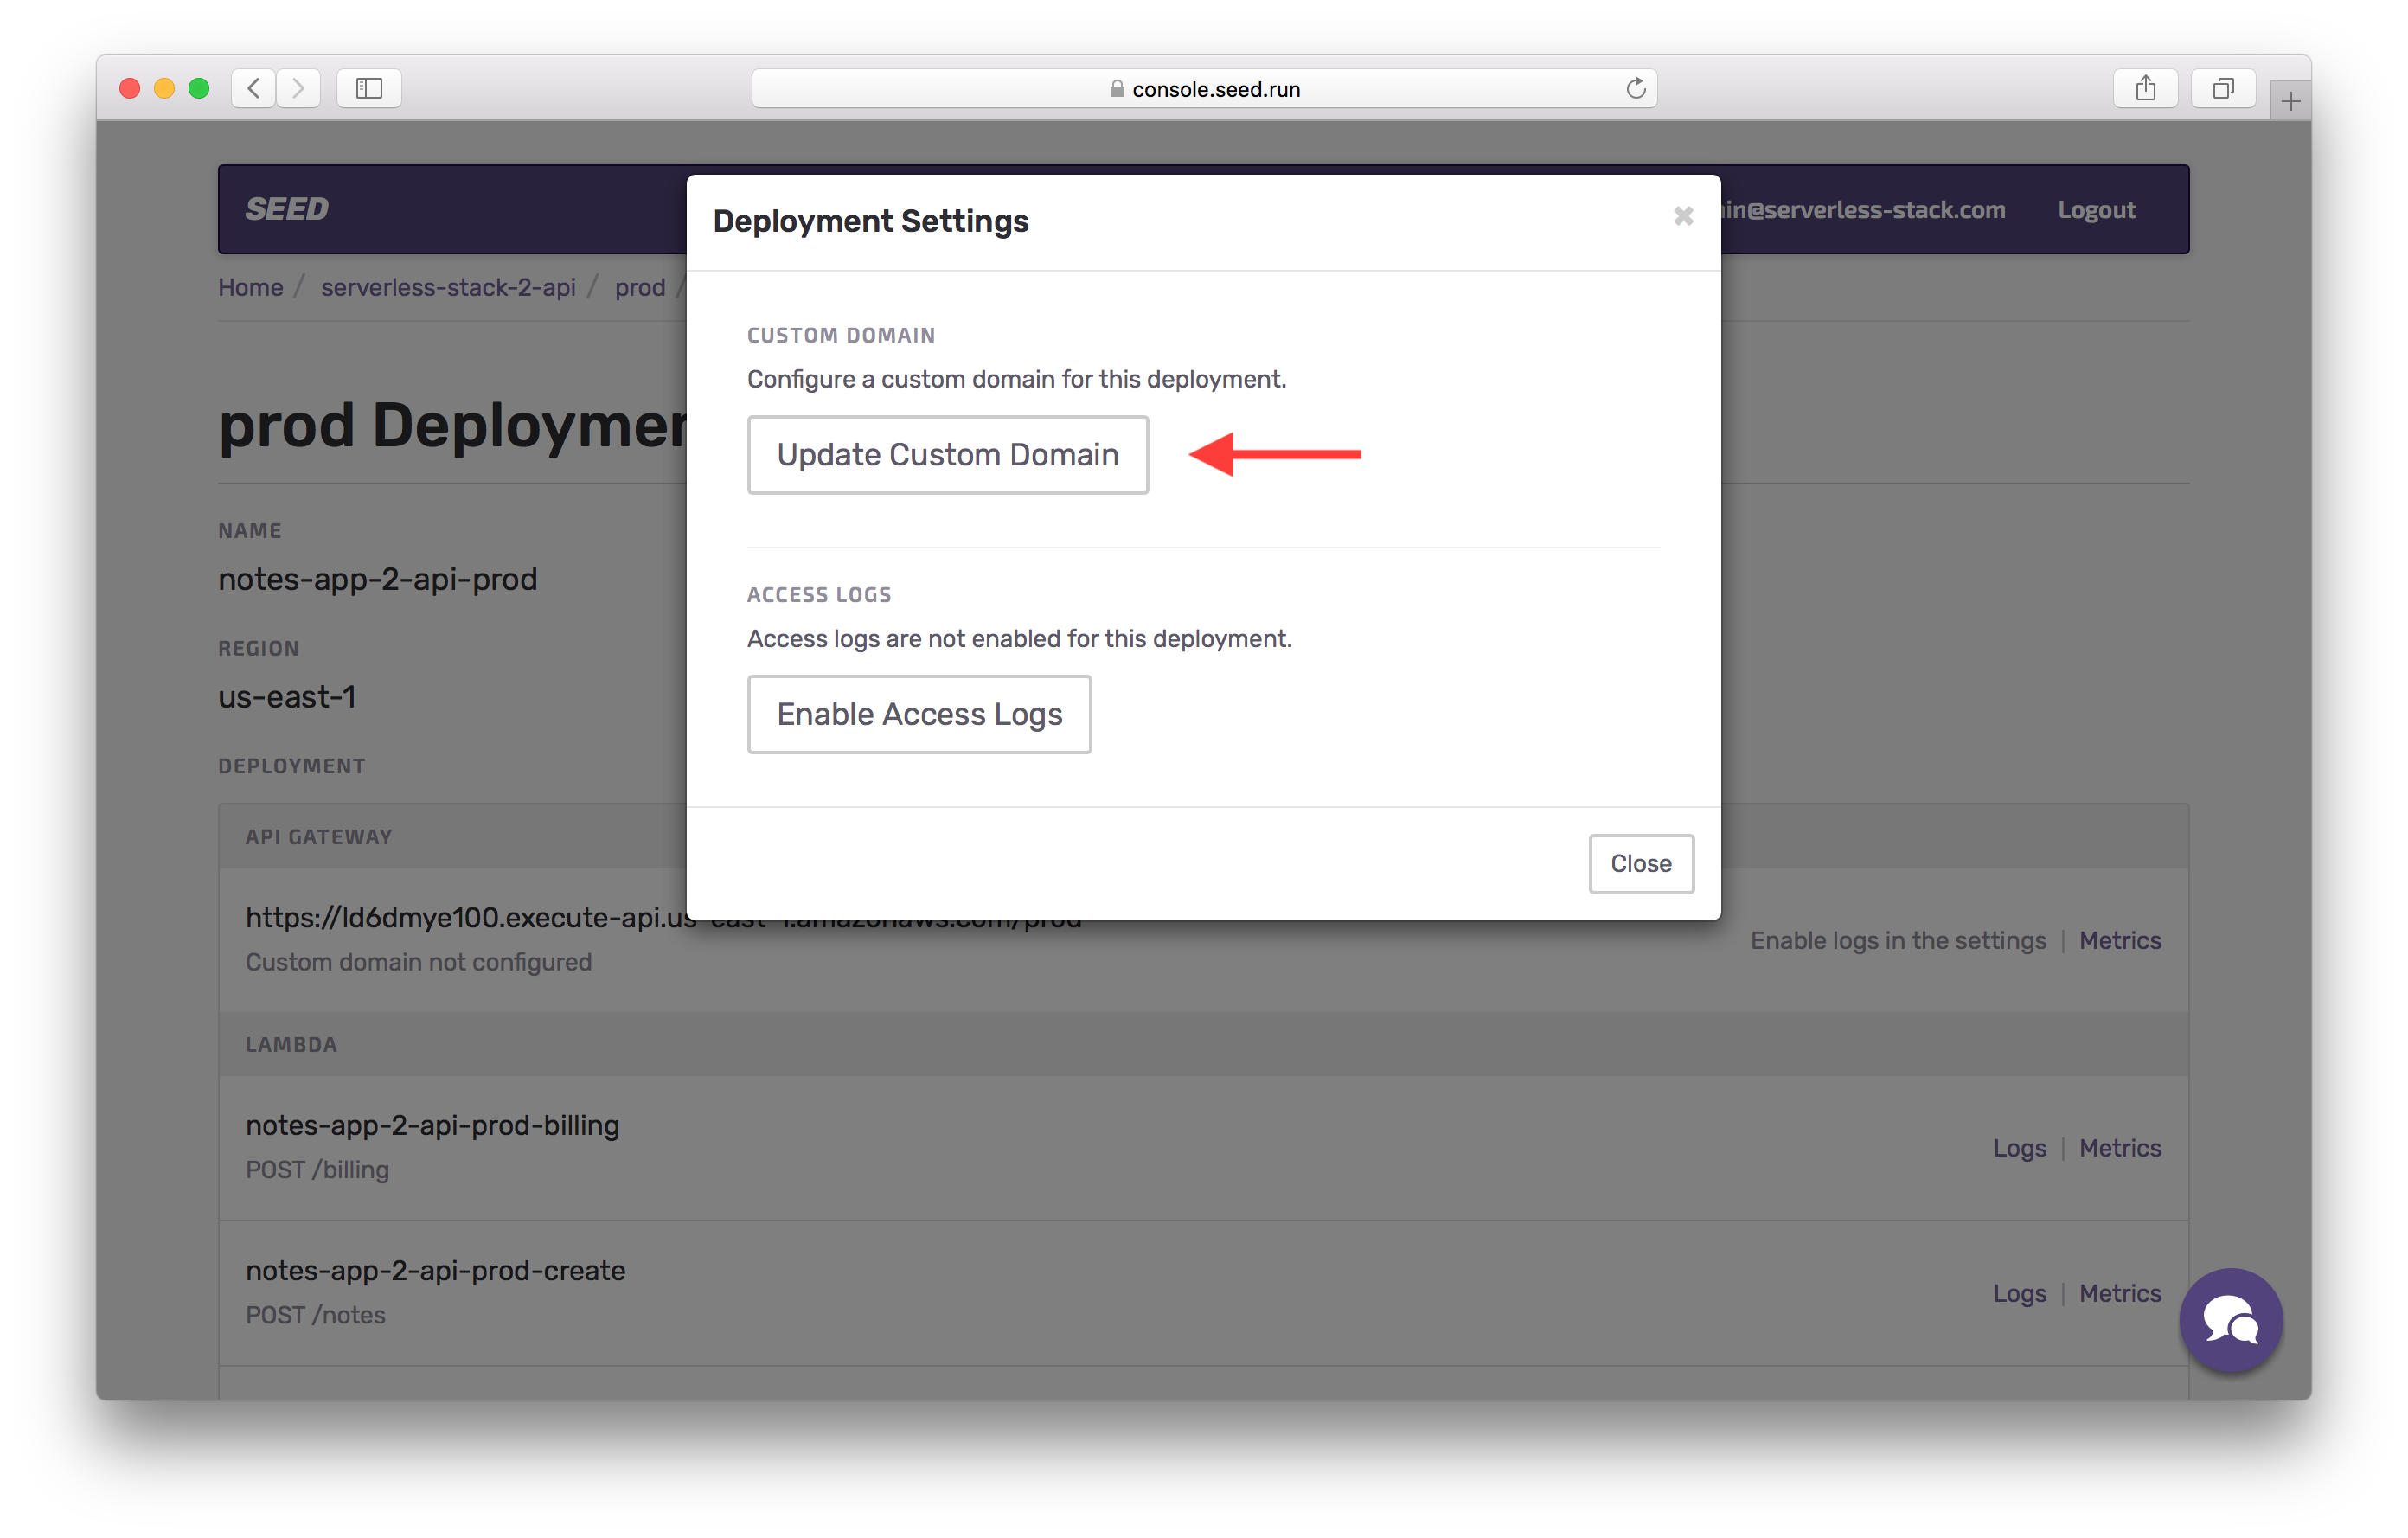
And hit Update Custom Domain.
In the first part of the tutorial we had added our domain to Route 53. If you haven’t done so you can read more about it here. Hit Select a domain and you should see a list of all your Route 53 domains. Select the one you intend to use. And fill in the sub-domain and base path. For example, you could use api.my-domain.com/prod; where api is the sub-domain and prod is the base path.
And hit Update.
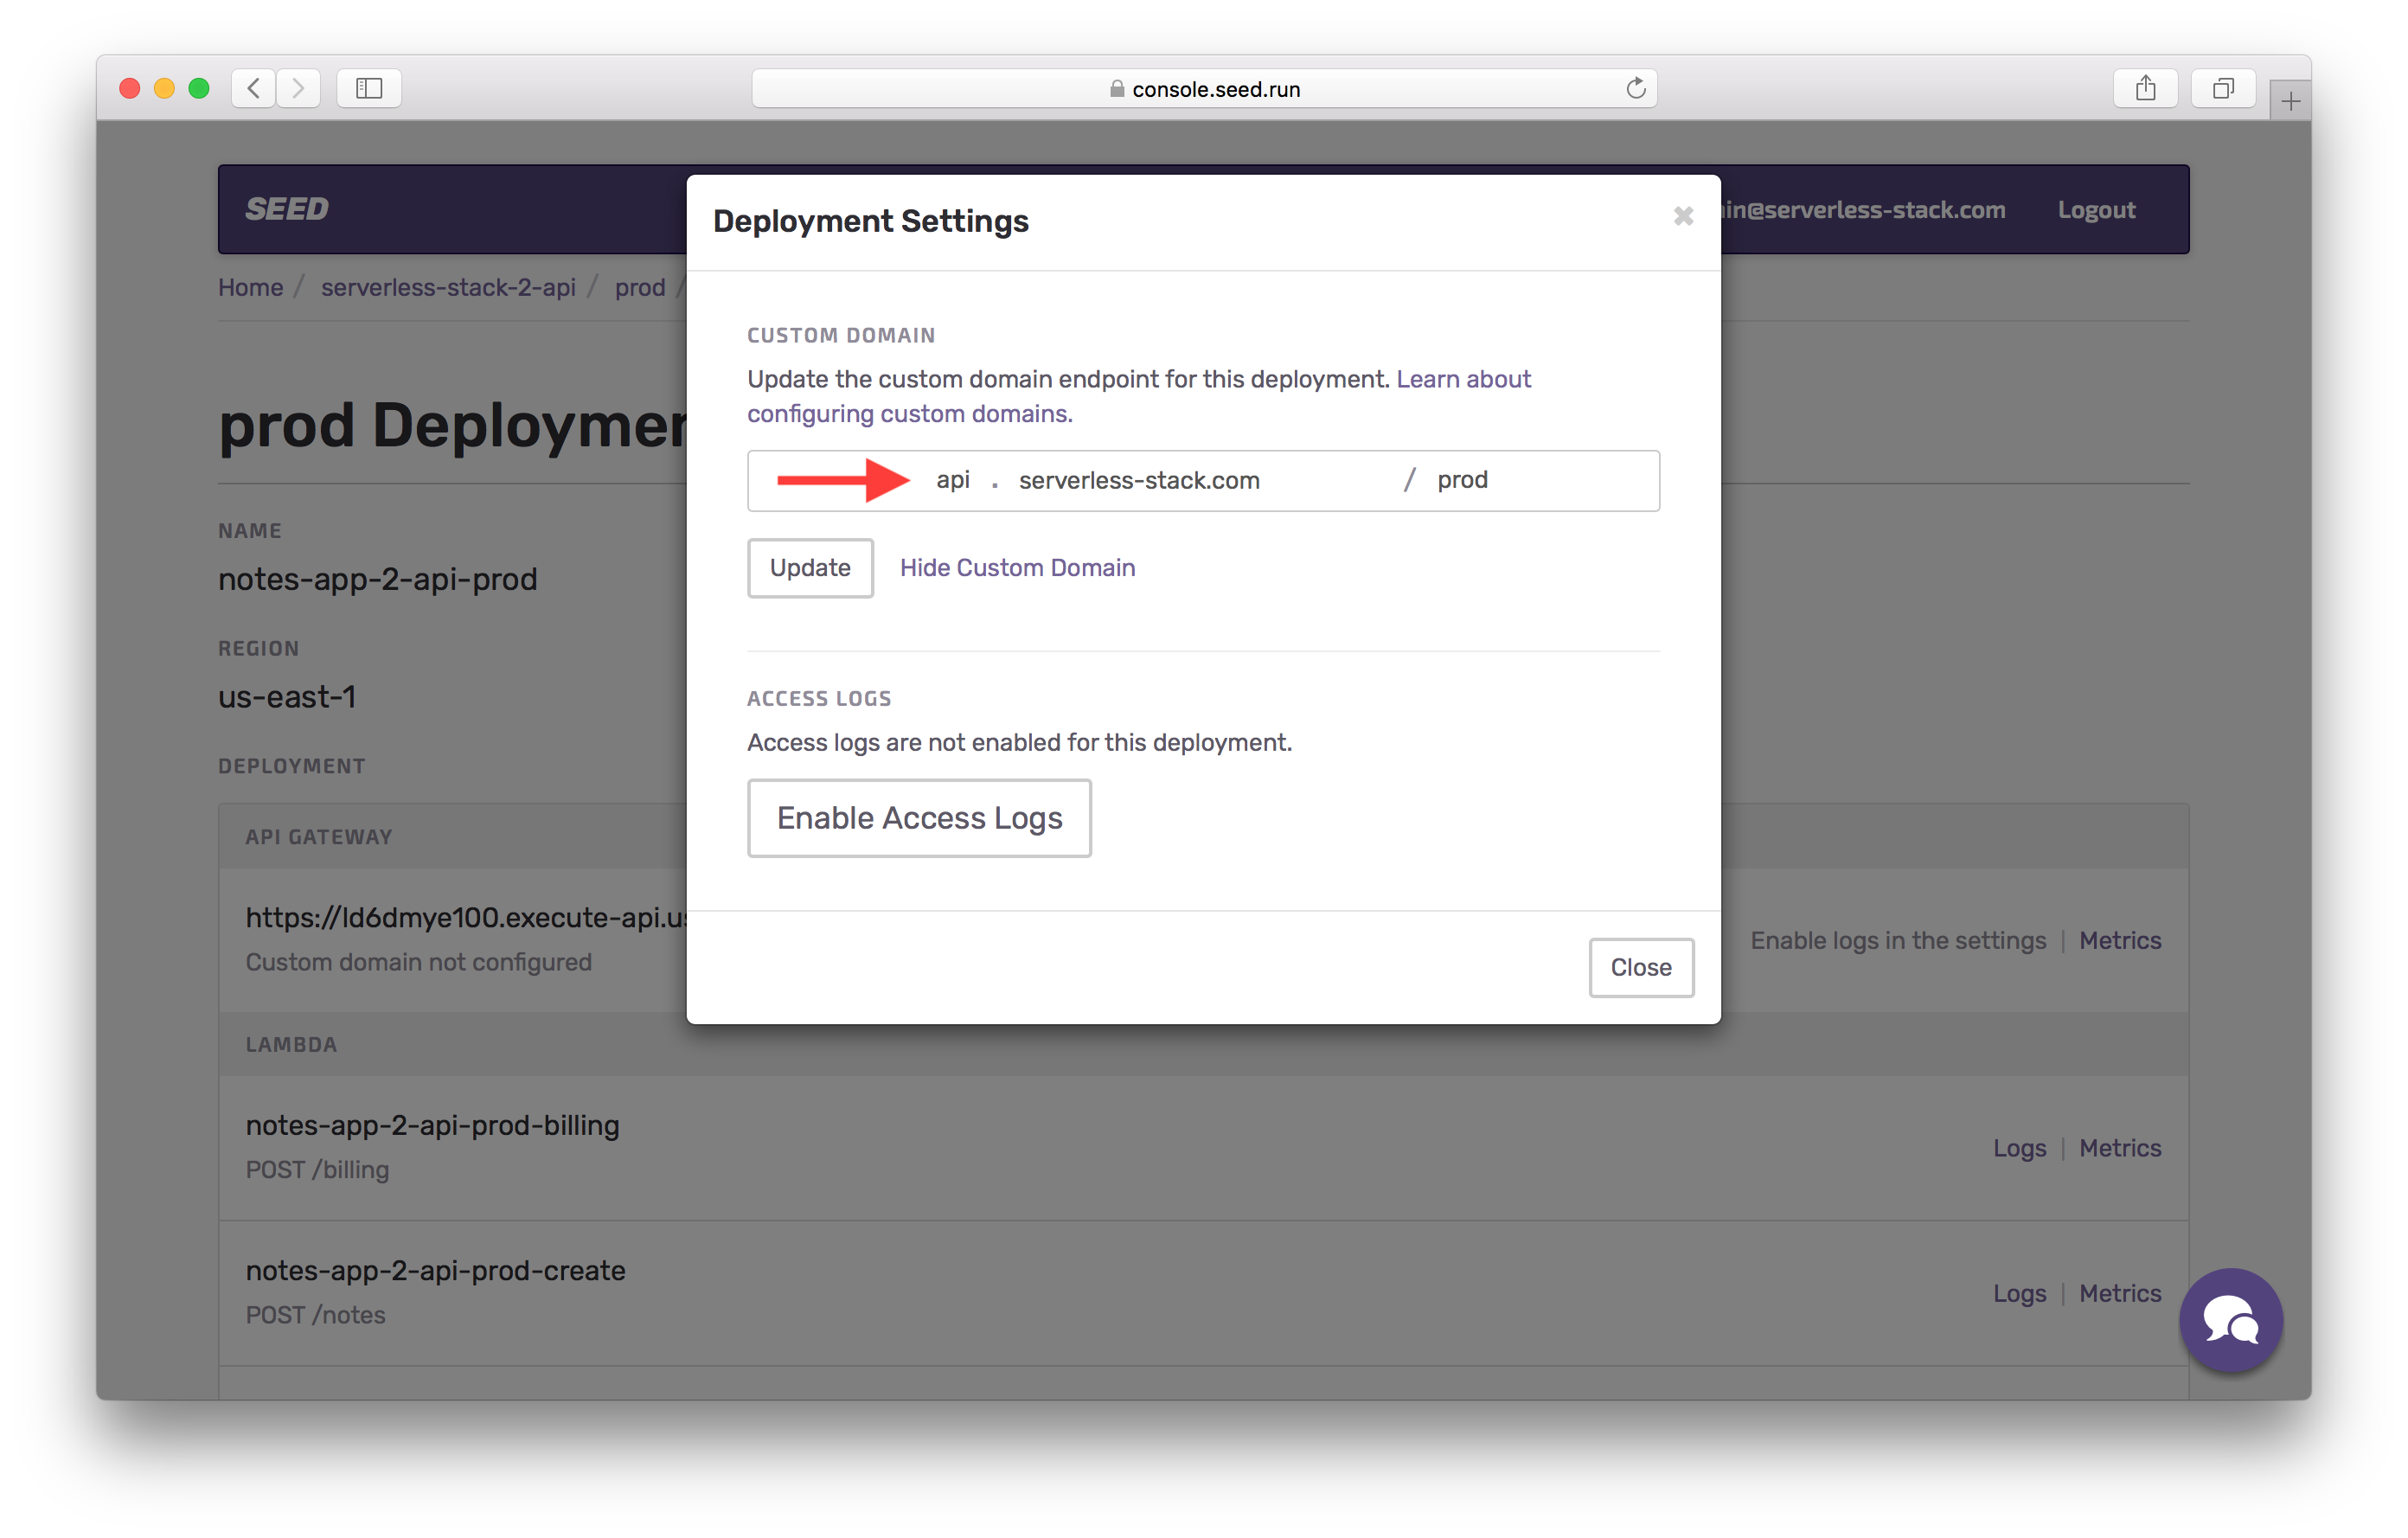
Seed will now go through and configure the domain for this API Gateway endpoint, create the SSL certificate and attach it to the domain. This process can take up to 40 mins.
While we wait, we can do the same for our dev stage. Go into the dev stage > click View Deployment > click Settings > and hit Update Custom Domain. And select the domain, sub-domain, and base path. In our case we’ll use something like api.my-domain.com/dev.
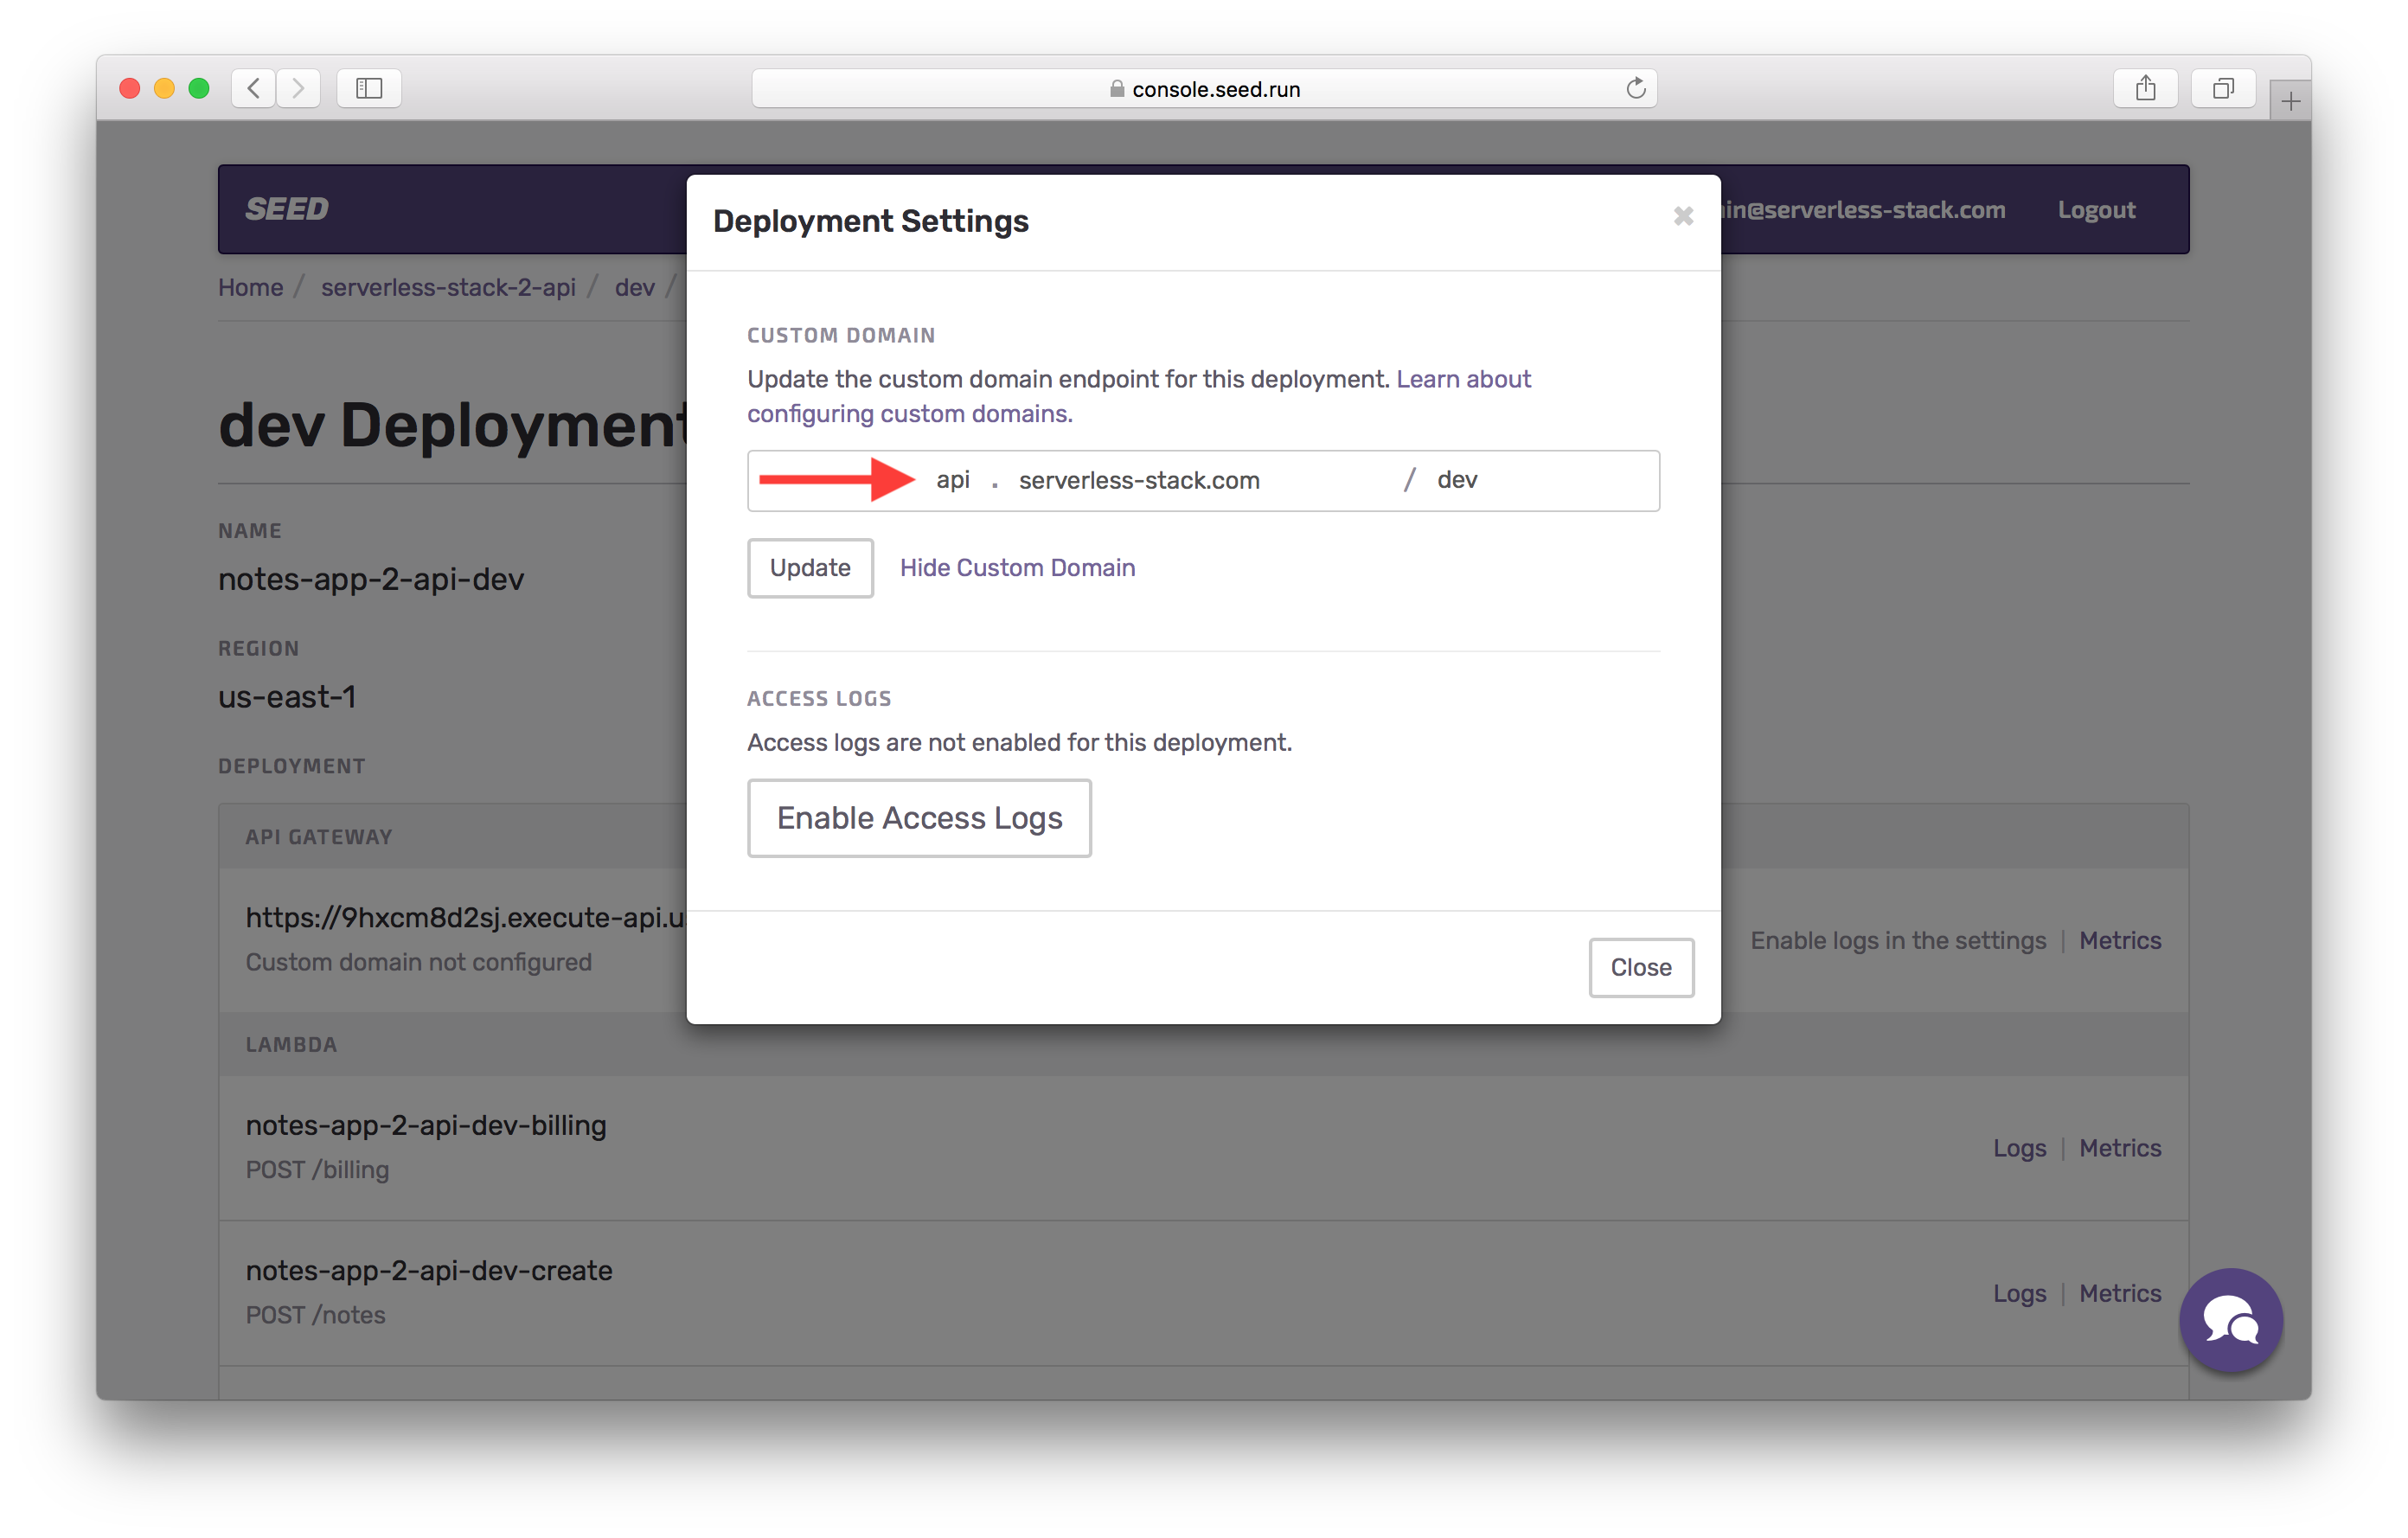
Hit Update and wait for the changes to take place.
Once complete, we are ready to test our fully-configured serverless API backend!

If you liked this post, please subscribe to our newsletter, give us a star on GitHub, and follow us on Twitter.
For help and discussion
Comments on this chapter